On at least a monthly basis, you should ensure that your bank transactions are fully accounted for. Bank reconciliation is the primary feature of Adagio BankRec.
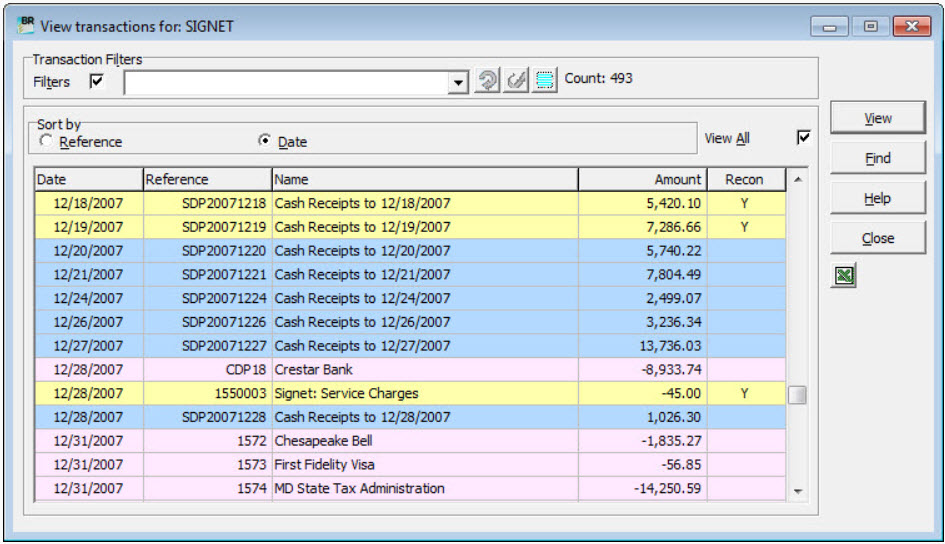 To access the reconciliation process, click the Recon button on the toolbar, or start it via Bank Inquiry. Then choose the bank you want to reconcile. The grid displays all transactions that are still outstanding. Records can be sorted by cheque reference, date, or amount. If you want to reverse cheques rather than perform a complete reconciliation, edit the check and change its status to Reversed. Reversing cheques will generate ledger entries and restore paid invoices. To choose the GL fiscal period updated by the reversal, select a date in the Reversal Options area. one click can select the same date as the cheque.
If the cheque was for a cash invoice from a payables vendor, you can enable an option in Payables to allow reversing the invoice portion along with the cheque. The Post button will then change to Post Reversal, indicating that only reversed cheques will be posted. If you want to reverse a receipt or deposit instead of performing a complete reconciliation, edit the transaction and change its status to Reversed. Similar to cheques, reversing receipts will generate ledger entries, restore paid invoices, allow selection of a reversal date, and change the Post button to Post Reversal. Processing reversals follows the same process as NSF receipts, creating batches in BankRec and Receivables for posting.
The first step in reconciliation is to enter the bank statement date and ending balance. This calculates the total amount that needs to be reconciled for the statement. You can hide transactions after the statement date—or any specified date—by entering a value in the Cutoff Date field. Transactions with later dates and no pending status change will be hidden. Most transactions are typically cleared. You can do this by selecting multiple transactions (they do not need to be consecutive) and pressing the space bar. This sets a pending status of Cleared, which will be permanently updated after posting.
Another status option is clearing a cheque with an amount error. If the amount cleared by the bank differs from what was entered in BankRec, the ledger error account can be edited if the appropriate option is enabled on the bank. Either of these changes updates the To Clear amount, showing your progress and whether additional cheques need to be selected.
If a deposit contains multiple customer receipts and only some have cleared the bank, you can split the deposit. Edit the deposit details, select the receipts that have (or have not) cleared, and ensure you select at least one but not all—otherwise, an error will occur. Click Split Deposit and enter a unique reference value for the new entry. Adding a small identifier, like a letter, can help distinguish it during the next reconciliation. Once saved, a new entry will be created, allowing you to reconcile only the desired portion.
To find a specific transaction, use the Find button and search by reference, including SmartFinder options. Another way to locate transactions more easily is to enable the Hide Pending checkbox, which shows only outstanding records. As you update statuses, press F9 to refresh the screen and hide pending items.
There are two reports available to help verify the reconciliation process:
- Bank Reconciliation Listing: Shows the opening balance, cheques to be cleared, new bank balance, outstanding cheques, and final cash balance. This can be used to reconcile with the ledger balance for a selected period.
- Worksheet Report: Lists all transactions with pending status changes, grouped as deposits or payments.
If you need to start over and remove all pending statuses, click Reset. This will mark all cheques as outstanding.
The To Clear amount must be zero before the Post button becomes active. This ensures that cleared transactions match the final bank statement balance. Once you are satisfied with the pending status changes, click Post to save them. You can also choose to back up related data during posting. A setting in the bank allows updates to Payables cheque reconciliation, transferring posted changes directly to Adagio Payables so you don’t need to re-enter them. You can choose Pending Status to require opening cheque reconciliation separately, or select Complete to post both reconciliations simultaneously.
Keep your bank reconciliation up to date to ensure everything stays in sync and nothing is overlooked.
Learn more about Adagio Bank Rec here.
You can watch the Show Me How video that demonstrates this process here. Additional training videos are on this playlist, on the Adagio YouTube channel.
